

This event was a dream come true! A nearly 3 year vision come to life, and it went very well.
About a month prior to the event I sent out an all call to my coworkers and the families that visit our library; asking for everyone to rummage through their tool boxes and work stations for spare materials. I know I had a bunch of extra bits and pieces that I’d never use, such as a butterfly hinge, a heavy duty hinge, and a couple knobs I had taken off of a re-purposed cabinet. And I knew I wasn’t the only one, especially in our time of Pinterest and DIY enthusiasts. I waited to plan exactly what we would build until I had the materials in hand. I had quite a few awesome large donations of hinges, handles, knobs, screws, nails, wood, and tools. These donations made it possible for us to have 4 focused work centers as well as plenty of material for independent exploration and imagination.
Here is how we set up the centers.
The box center required the most hard ware and skill level. If I had to put an age range on this center I’d say ages 8+ with the help of an adult.

The next center is our House center. Ages 6+ can do this center, with the help of an adult. There is little to no hardware, but balancing the roof was quite challenging.

The Shield center was our easiest center. All you need to make a shield is a thin flat piece of wood (any shape) and a handle. We had a great selection of handles to choose from. This center is great for children 5+, if you predrill the holes for the handle they won’t need very much assistance, if any at all. (I did not- I wanted the children to pick where they wanted them and had them mark where they wanted the holes- and then I’d start the holes with the drill to make it easier)
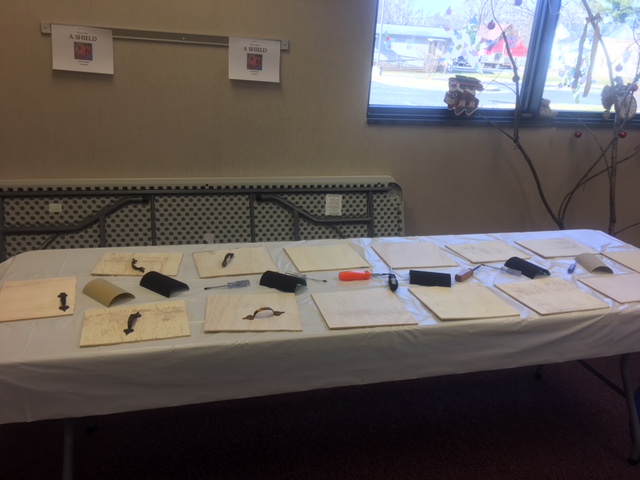
And last is our “Littles” Table. We bought a handful of these $1-$3 kits at michaels and walmart specifically for anyone that was under the age of 5 who lost interest in the more DIY projects. These have all pre-cut, pre-drilled pieces that require no hardware. They are relatively easy to put together but the children will need help from an adult. I’m not the biggest fan of these kits, and they will not be good for anyone under the age of 3 because of small parts. But they were good to have for the handful of children ages 3-5 that were not quite ready to build from scratch.

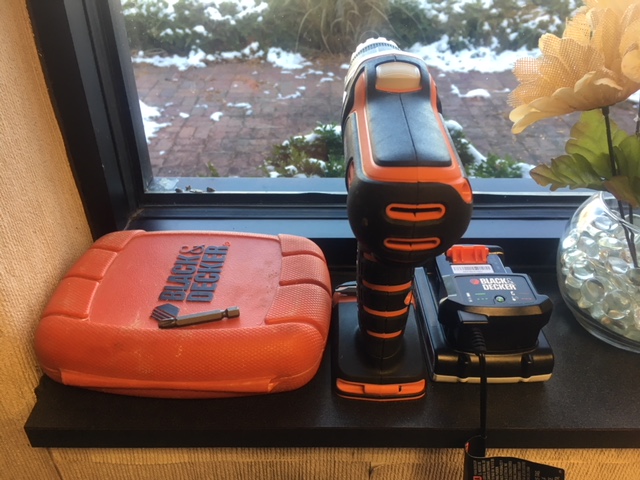
I had the drill up high so that only myself and other adults would be able to use it. Some parents taught their kids how to use it and let them handle it and practice with it, highly supervised.
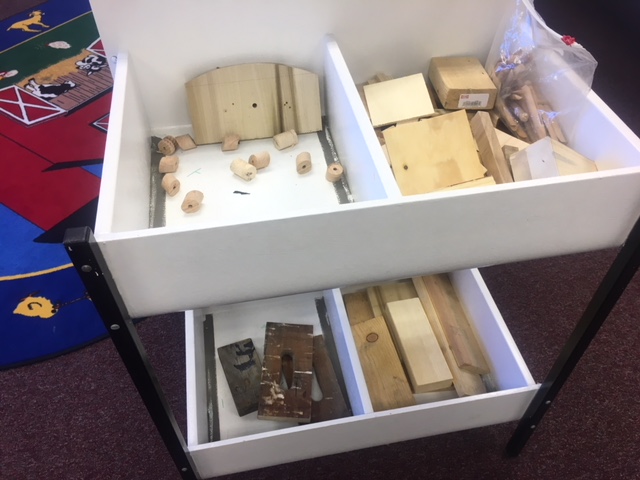
I offered additional tools in the event we stripped a screw and needed the pliers to pull it out, or if anyone needed to hold two pieces of wood together, and so on. Children come up with some of the most inventive ways to do things.

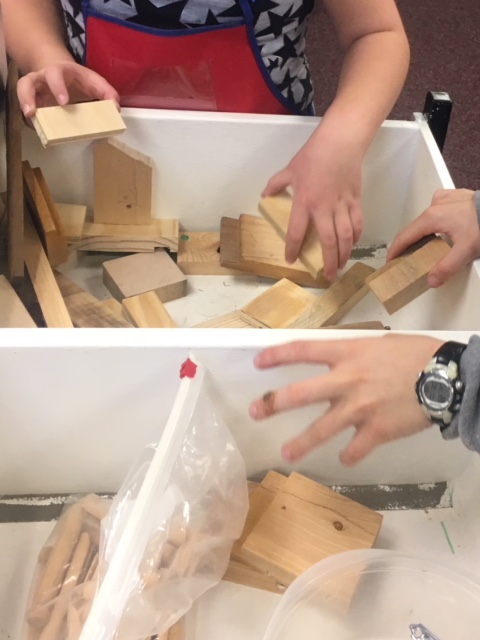
Also a whole stash of spare wood!
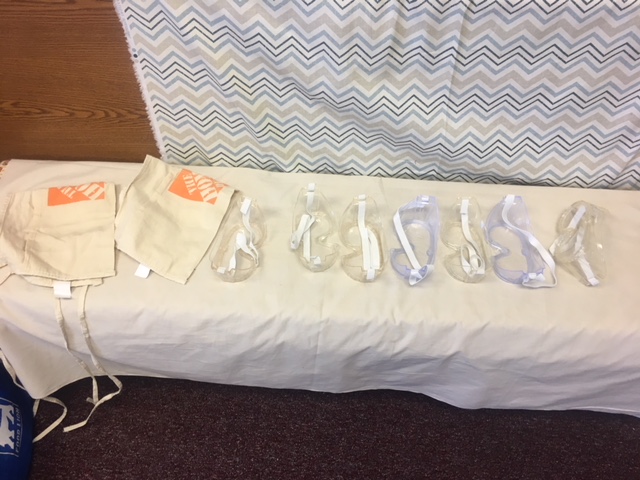
I also offered smocks and safety goggles as this event tends to get messy and there is always a chance of eye contamination when you are sanding and splintering wood.

I made one table the paint table so all creations could be painted if desired, and asked families to check their name off the list and make a name tag. I used the list to give priority to the families that signed up first with picking a station first. We had 33 people in all, 22 or so on them where kids. There was enough material for 40 different planned projects (14 shields, 8 boxes, 8 houses, and 8 kits) It worked out that there was enough of each project that we did not have a shortage of any one project and anyone who wanted to make something specific had the option to do so. (that was something I was really worried about) The best part of all this was realizing that MOST of the children actually didn’t want to make the pre-planned projects. They were good to have to help with maintaining and managing the event. And parents like to have a plan, where kids will always make their own plan. 😉


And now… the main event!
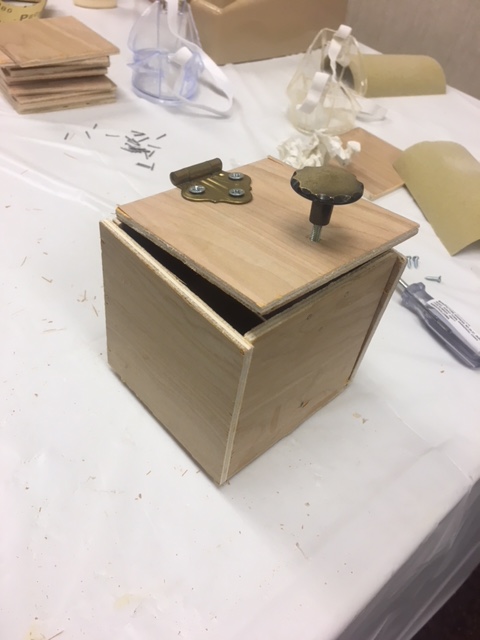
A beautiful box! This was made by an older child (I’d guess between the ages of 10-12) and her mother. The group realized that the tiny tack nails (pictured) did not go into the plywood as easily as planned. So gluing the boxes together became priority. We also had to really think ahead when putting the boxes together. I had my wonderful, patient boyfriend cut most of the wood for me. To make things easier for planning I asked him to cut the wood into as many 4″X4″ pieces as possible. The boxes and houses could be made by all 4″X4″ pieces with a little adjustment. This did make assembly a little tougher, but that is part of the learning process in my opinion. Drilling through the plywood should be done in moderation as plywood will splinter. I suggested that families start the holes with the drill, but use physical force to get the screws in the rest of the way. And the last hurtle we had to jump was attaching the hinge. We learned that you can not place the wood right up against the joint on the hinge, or it will not close! It is actually better to do one part of the hinge on the outside of the box and one on the inside to prevent any possible interference. Learning!
These two are making a car!

These two worked together to make a toy car garage with an actual moving door! They were very careful to mark and measure their work.

It’s Mary and Joseph for the stable she just made!

Rummaging for more parts!
All working together to create houses, stables, and churches!


Deciding where he wants the handle for his shield!

Many kids did not finish their projects in the hour, and took them home to finish. I will post any pictures I get of the finished projects as I get them!
